Dual Boot Ubuntu on Mac
This is step by step guide to install Ubuntu on Mac in dual boot configuration without using rEFInd or any 3rd party tools. I assume you have created a bootable Ubuntu USB flash drive installer and have verified the contents. I also assume you have verified hardware compatibility by successfully booting the live version of Ubuntu on Mac.
First step would be to create Space for Ubuntu which is as follows:
Create Space for Ubuntu on Mac
Open Disk Utility on your Mac, Select Main drive and Click Partition.
Create partition for Ubuntu installation, this partition will consume most so give it at least 20 GB. Click +, give partition a name, give a size and click Apply
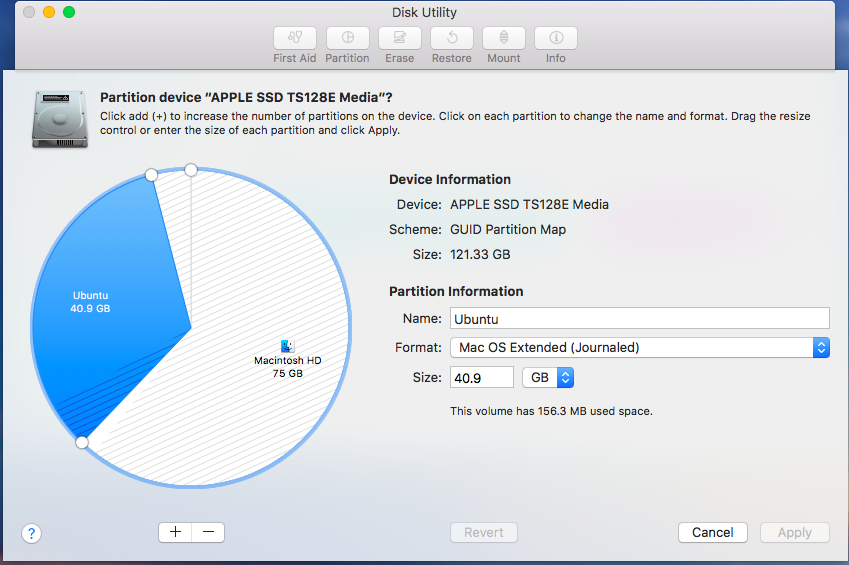
Create partition for Swap area. Size of this partition should be between 1 to 2 times the size of the memory installed in your Mac computer.

Close the window and Disk utility main window will show something like this.
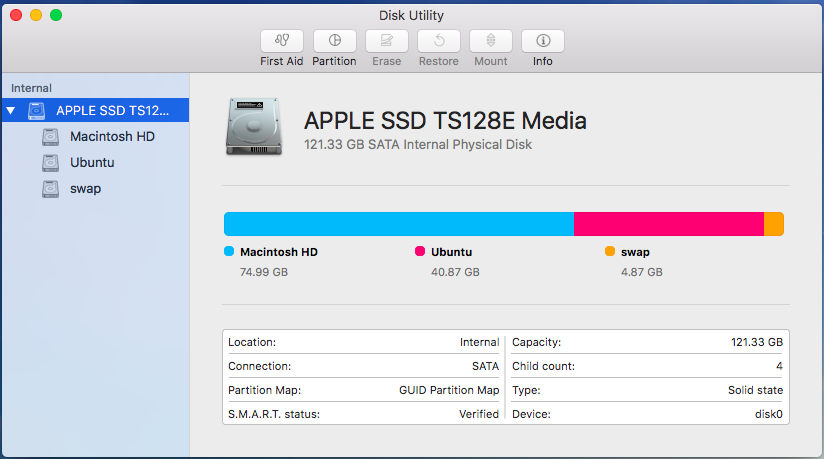
Now you have created Space to install Ubuntu on you Mac. Proceed to next step which is Installing Ubuntu.
Install Ubuntu
1. Insert the Ubuntu flash drive and restart Mac. Hold down the option key to invoke the Startup Manager. Select to EFI boot from the USB flash drive. When prompted, choose the option “Install Ubuntu”
2. Select Language
3. Select “Install third-party software…” and optionally select “Download update while installing Ubuntu”
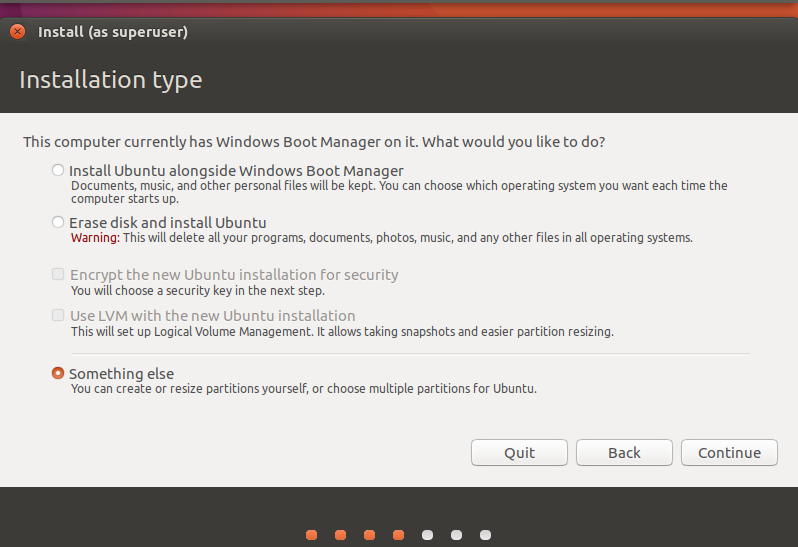
4. Choose the option shown below
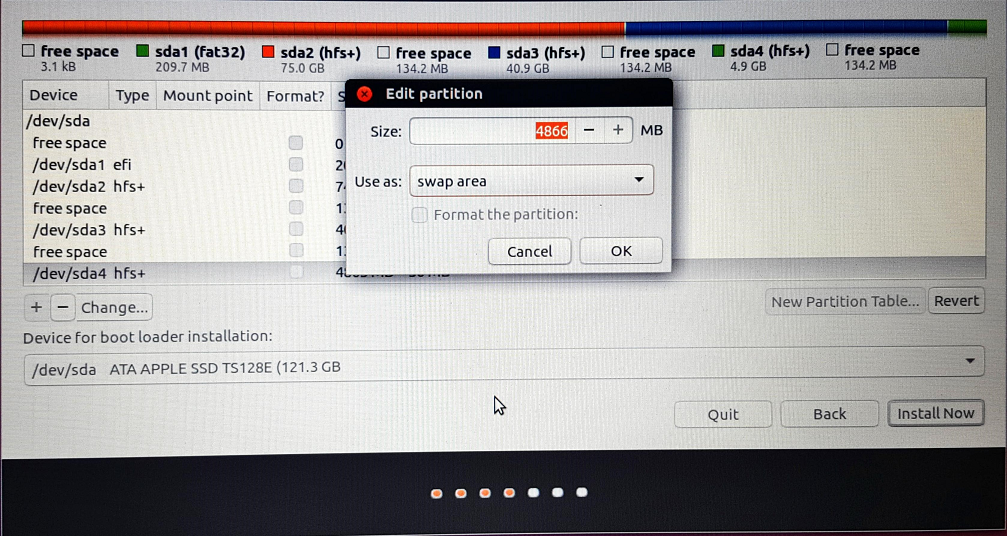
5. Select SWAP Area, this partition should be the same size as previously specified for the Swap partition in Disk Utility
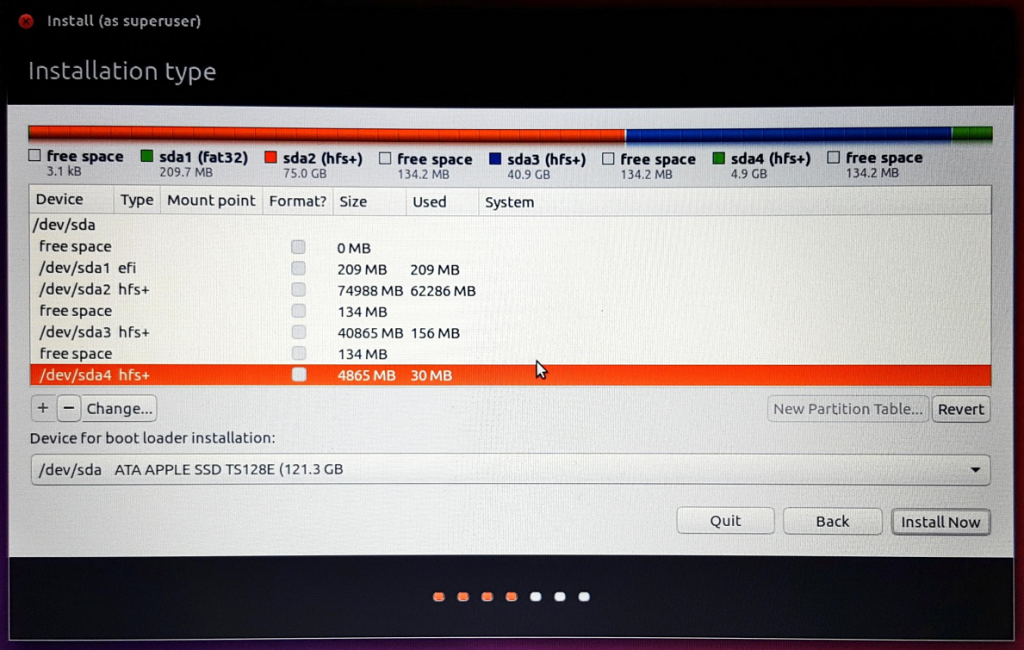
6. Click on “Change…” and select “swap area” in the popup window as shown below. Do not change the partition size. Next, click “OK”.
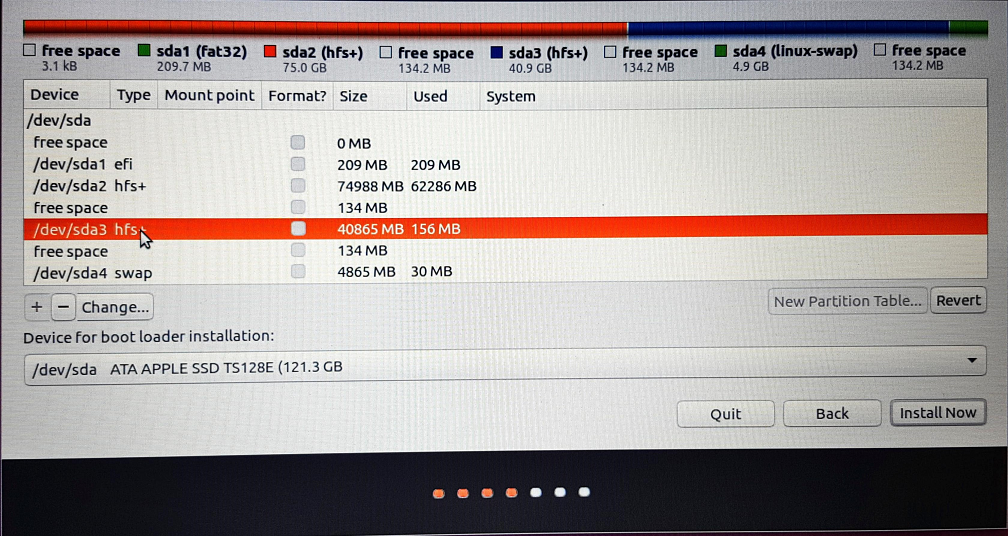
7. Select the partition which was created for Ubuntu installation. Next, click on the “-” to delete this partition.
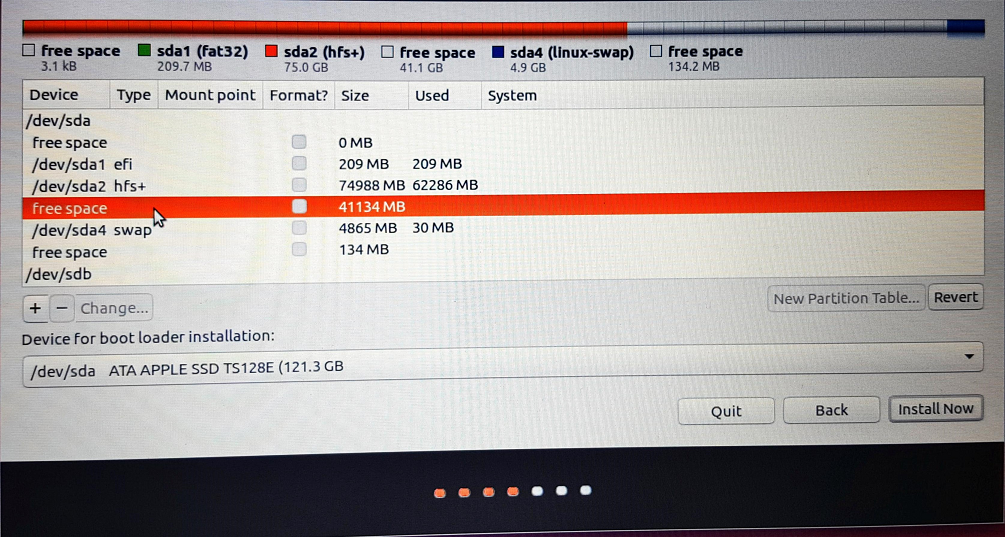
8. Select the free space as shown below.
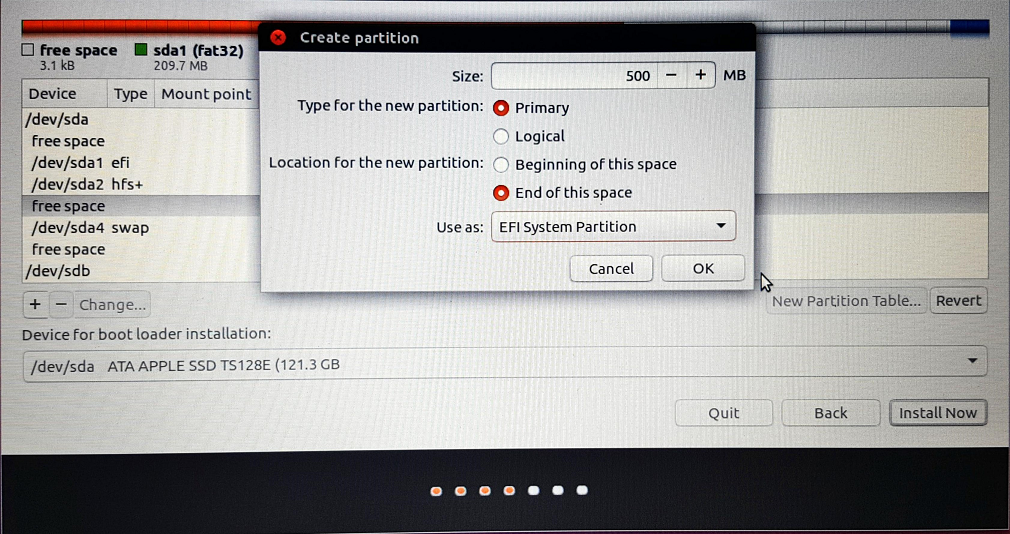
9. Click on the “+” to open a “Create partition” popup window. Select “EFI System Partition”. Also, change the size to 500 MB and click on the “End of this space” button. Next, click on “OK”.
10. Select the free space as shown below.
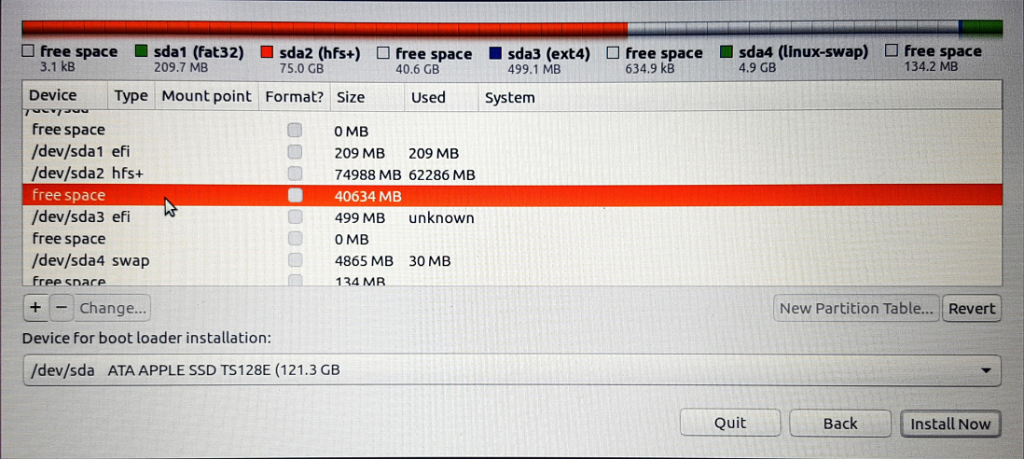
11. Click on the “+” to open a “Create partition” popup window. Select “Ext4 journaling file system”. Also, select “/” as the “Mount point”. Do not change the partition size. Next, click on “OK”.
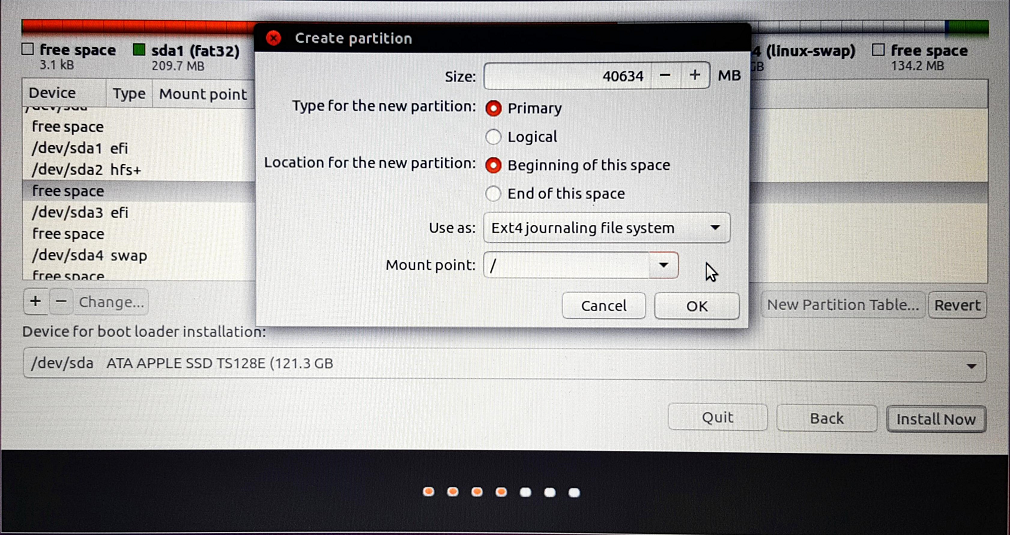
12. Click on the “Install Now” button shown below.
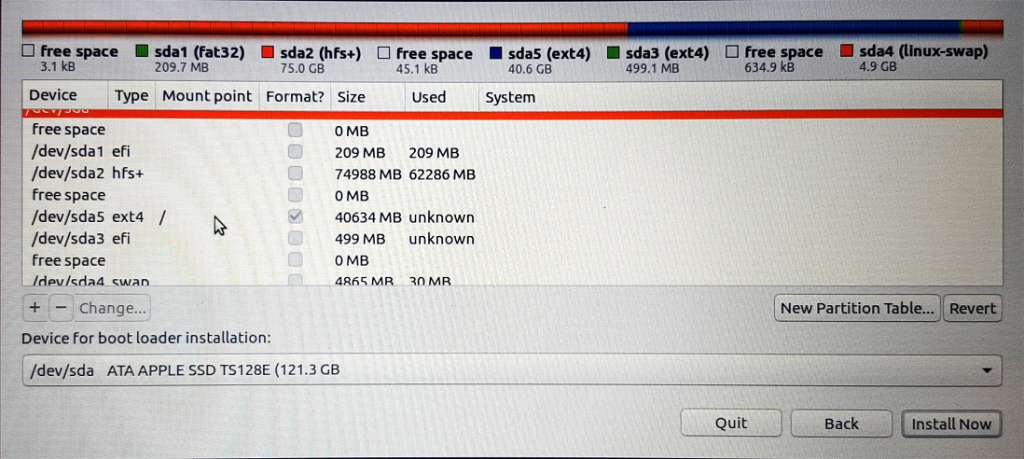
13. Click on the “Continue” button shown below.
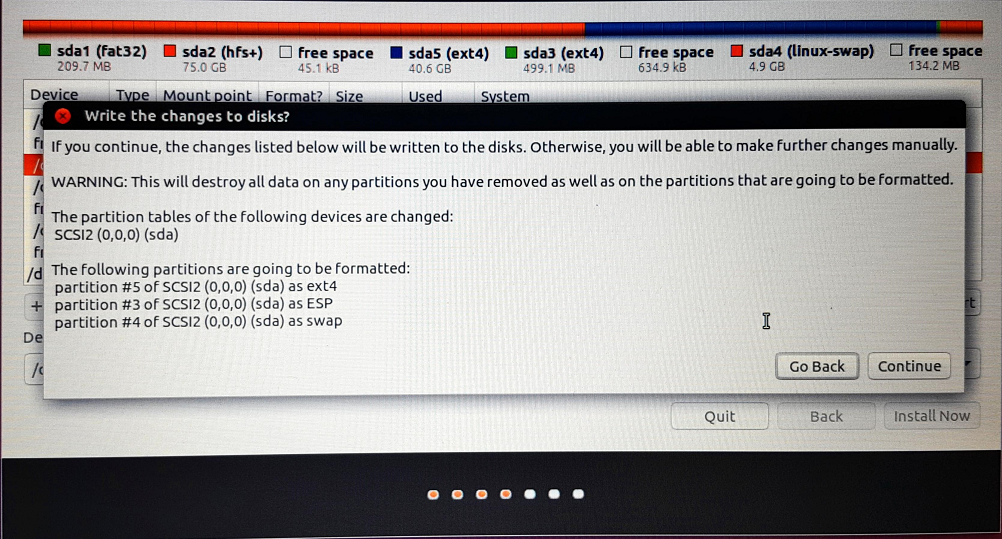
14. Select options on the next screens as per your region.
15. When finished, restart and hold down the option key to invoke the Startup Manager. Select to boot from the macOS volume.
Now installation is complete. We’ll move to next step which is to include installed Ubuntu in the boot menu.
Add Ubuntu to Startup Manager
Run command
diskutil list disk0
and it will display something like below
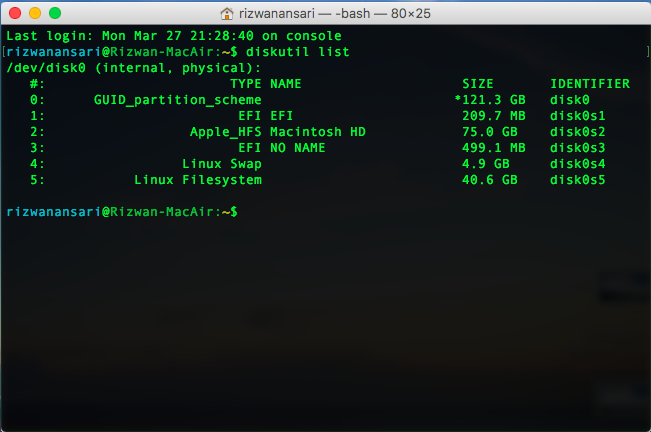
To make Ubuntu appear in the Startup Manager, execute the following steps.
1. Mount the EFI System partitions by entering the commands given below. (change identifier as per result of above command)
diskutil mount disk0s1
diskutil mount disk0s3
2. Use the Finder application to copy the EFI folder from volume EFI to the volume NO NAME.
3. Remove the folders and files that were added to the EFI volume during the Ubuntu installation i.e. move the folder EFI/Ubuntu on the EFI volume to the Trash.
4. Remove the Microsoft related files from the NO NAME volume. To accomplish this, move the folder EFI/Microsoft and the file EFI/Boot/bootx64.efi on the NO NAME volume to the Trash.
5. Empty the Trash.
6. Copy the file grubx64.efi on the NO NAME volume from the folder /EFI/ubuntu to the folder /EFI/Boot.
7. Rename the file grubx64.efi in the /EFI/Boot folder on the NO NAME volume to the name bootx64.efi.
8. Enter the commands below to unmount the EFI System partitions labeled EFI and NO NAME.
diskutil unmount disk0s1
diskutil unmount disk0s5
Bingo!! Now when you Hold down the option key while restarting, you’ll get option to boot from with macOS or Ubuntu.